Monday, March 19, 2012

Felt Flowers #2!

Okay, so these are totally different than the felt flowers I have made before, but the common thread is felt!

 What you need:
One or two (depending on your circle size) sheet(s) of felt (like the ones from Michael's or Walmart...not sure what size that is)
Sharp scissors (you can use dull...you'll just regret it, TRUST me)
Pencil
Glue gun (and glue sticks...hey, you can't say I didn't tell ya)
Button
Something circular to trace (cup, ribbon spool, I used a coaster)
Hair clip or pin (depending on what you decide to do with your flower)


So, let's do this! Start by tracing your circles on your felt. You will need 6 larger circles total, and one small circle of  felt. 

Just in case you need to know what 6 circles look like...haha
Take one circle at a time and repeat the following steps for all six larger circles. Fold your circle in half. It should look like a taco, if that helps.
Now, take one of the corners and fold it up to make a triangle shape.
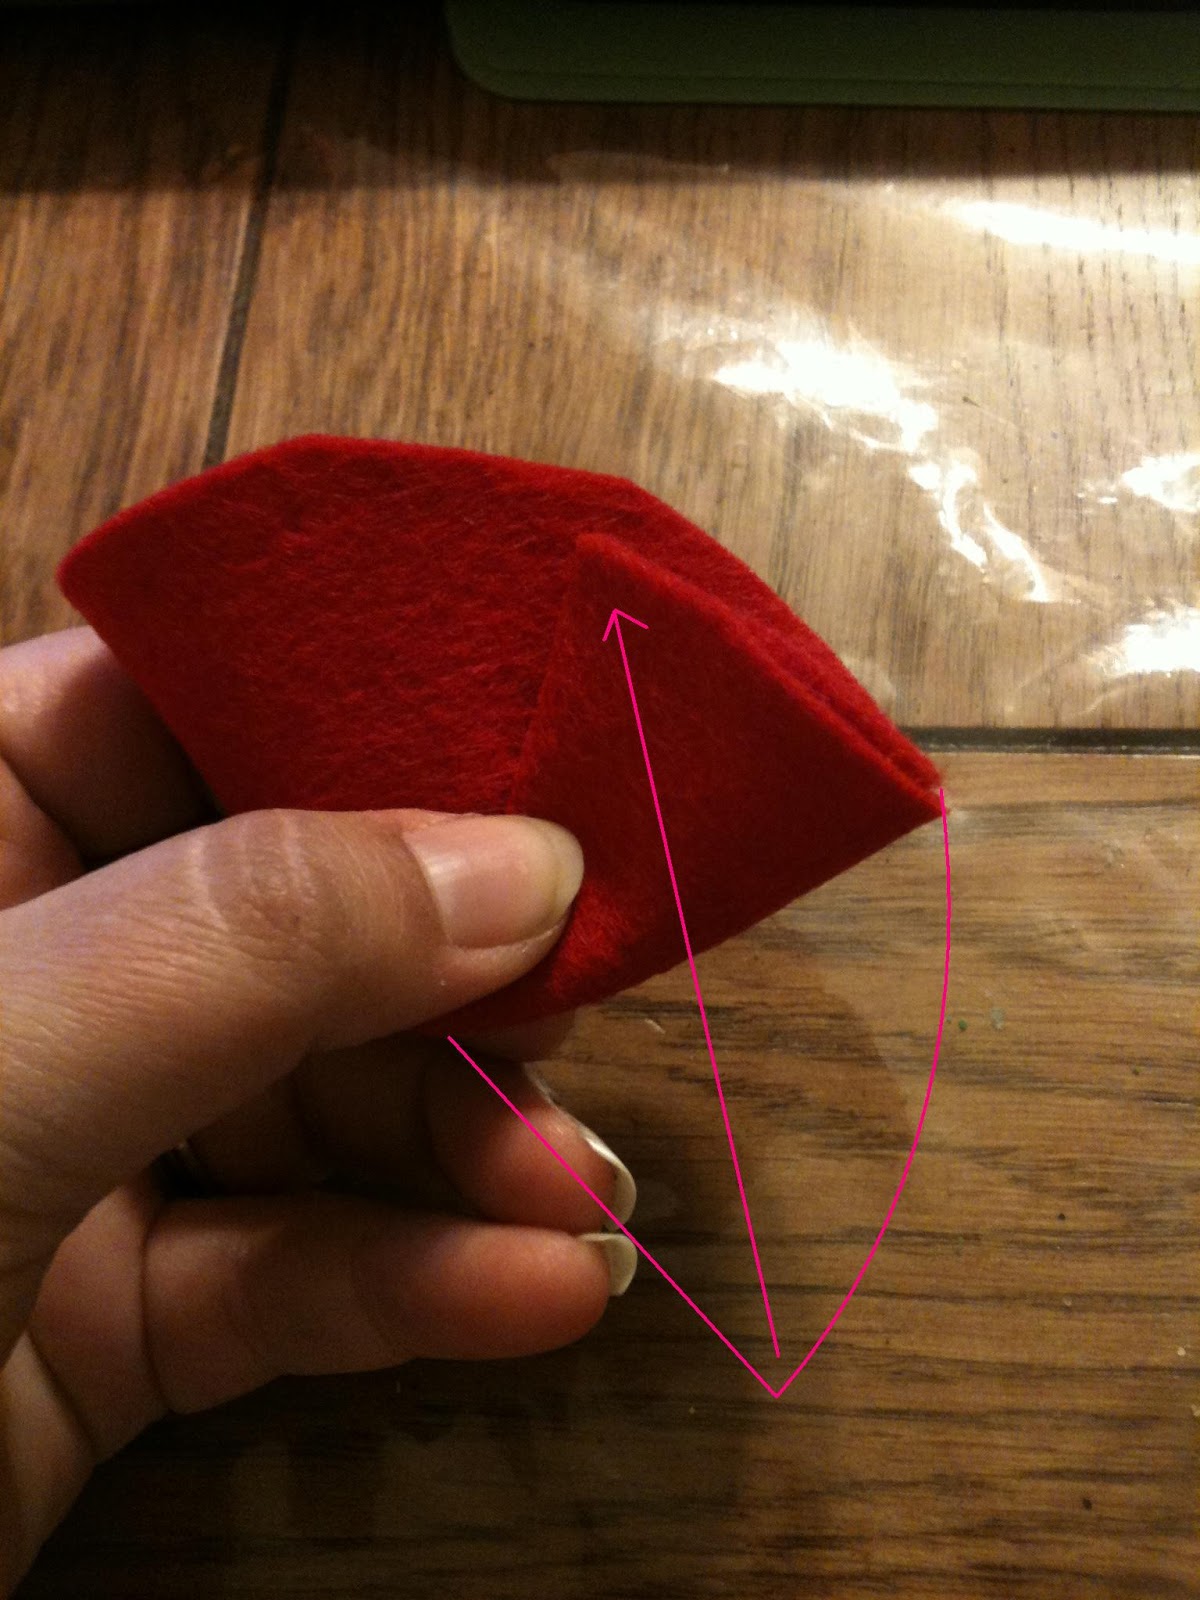
Now, fold the opposite corner behind. You should get an "S" shape.
Do you sssssee it? Good. Now you will need to secure the folded circle by adding some glue at the folds.
I was able to capture this step thanks to the help of my lovely assistant, my sister in law, Sarah.
Okay, now that it is secure, you can attach the triangle to the smaller circle with your glue gun. Repeat with all six circles.
It should look like this.
Almost done! Now you can attach your button. I glued mine on but you can sew it if you like. If you want, you can add a jewel or any other center instead.
Lastly, add your clip or pin and tada!
Gorgeous! And a shout out to my mom in the background. =)


Enjoy!

Saturday, March 17, 2012

St. Patrick's Day Bell Pepper Art!

Okay, so with a daughter named Molly, how could I NOT post a St. Patrick's day project??

What you need:
Green paint
White paper
Bell Pepper
Knife
Paint brush

First, cut your bell pepper in half (be careful!!). You can remove the seeds if you like (I did), but be careful not to scrape out the inner walls (that helps make the "clover" shape).
Next, pour a layer of paint in a pan or tray and dip your bell pepper cut side down.


Stamp bell pepper on paper and TADA! Oh, and you use the paint brush to draw the clover's stems.
I got two bell peppers, one that had a "three leaf look" to it, and one that had a "four leaf look" (pictured above).

The kids really liked this one, and I hope you do too!
Enjoy!


Thursday, March 8, 2012

Hand Print Easter Lily

Okay, so if you know me, you know I LOVE hand print art. So this project is no different! It's a favorite of mine I do every year at work and with my class at church. It's a neat project that you can do with the kiddos and each year as your child grows so will your new lily!

What you need:
White and green construction paper
Scissors
Green pipe cleaners
Stapler
Pencil
kid (can use adult if no kid available...it's just kinda weird)


Okay, so first you trace your child's hand on the white paper. For this end product I made three flowers, in which case you will need to trace your child's hand three times...makes sense, right? Cut out the hand(s).

Next you are going to take the two lower sides of the hand and bring them together. Don't crease it! You want it to have a round shape to it. 
Now you insert the pipe cleaner into the bottom of the rounded hand print and staple it closed.

Now grab that pencil! We're almost done! Beginning at the tips of the fingers, roll the paper around the pencil towards you. Repeat for all five fingers...unless you don't have that many...
So far, so good? You can stop with one or you can make as many as you want! For my example I made three and added two leaves. Should you decide to proceed...here's what you do.
Trace your child's shoe.


Once it's cut out, cut it straight down the middle.
Now, using that pencil rolling you did with the hand (which you're a pro at now, right?), roll each shoe half at a diagonal. 

Now attach them to flower(s) and display proudly! 


You can get a bit more creative if you want and use yellow pipe cleaners for the center of the flower.
Hope this one will become an Easter favorite with you too!
Enjoy!


Friday, March 2, 2012

Happy Birthday Dr. Seuss!


I didn't have art this week at work but I just had to share! This is what the kids made!
(I made the big guy in the middle)
Enjoy!

Friday, February 24, 2012

Letter Art

What you need:
Buttons (all sizes)
Wooden Letter
Ribbon
Paint
Paint Brush
Glue Gun
Scissors

Okay, so I don't have step by step picture instructions on this project, but it's pretty self explanatory.

 Paint your wooden letter. Get buttons of all shapes and sizes, and hot glue them on! You can do a pattern, or a design, just have fun! Once you're done, cut ribbon and attach it to the top to hang your letter. If you are wanting a more...masculine look, you can leave off the ribbon and add a picture hanger on the back.
Enjoy!

Tuesday, November 22, 2011

Toilet Paper Tube Turkey

What you need:
Toilet paper roll (the one I used is about half as tall as a regular one)
Brown Paint
Scissors
Glue
Black and Red Marker
Orange, Yellow, Red, and Brown Construction Paper

First things first, paint your toilet paper roll brown and allow it to dry. Next, cut our the shape for your turkey's head. Add beak. Draw on face.


Now cut out the three tail feathers. The feathers will get gradually smaller, but the same width at the base. 


Layer the three feathers and glue together.


Attach the head, wings,  and feathers to the toilet paper roll.


Cute on your table or even as a napkin ring!

Enjoy!


Friday, November 11, 2011

Turkey Wreath

Here's a fun one to do with your little turkey!

What you need:
Red, green, yellow, orange, and brown construction paper
Scissors
Glue
Paper plate
Marker
Google eyes

Step 1: Get a paper plate and cut out the middle.

So far so good?
Next, cut out your turkey shape. The kids where I work were quick to point out the fact that my turkey body is very similar to a bowling pin =)

Now that you have your body, cut out your feet beak and waddle and glue on. Don't forget the eyes!

Attach your turkey to the bottom of your paper plate. DO NOT attach the turkey's head to the top of the plate...I promise it will all make sense later....just trust me on this one.

Now it's time to make the paper strips that will become the "feathers" for your gobbler.
Cut strips out of your red, green, orange, and yellow paper 1"x6" (about).  The more strips, the fuller the feathers will look. I used about 4 of each color (that's about 16 altogether...just thought I'd help you out).
Cut a slit on the top about halfway through the paper and on the bottom in the opposite direction.

Take the two slits and fit them together to form tear drop shape.

This step can be skipped if you just feel like gluing the two ends together...but you will have to hold it together til  it drys before you can put it on the turkey...and with a group of kids, this way was MUCH faster!
Okay, time to start adding your feathers! I did mine in a sort of overlapping "V" patter, but it's your project, go crazy!

Once you have all your feathers on, cut out two wings for your feathered friend. Bend the rounded side of the wing. This will be where you attach it to your turkey, and it makes it pop out.
Attach your wings, make a cute little sign for your turkey to hold, and TADA! A totally terrific turkey! Hang him on a door knob, or on the wall, it's your choice. Enjoy!


OOOHH! I almost forgot! The reason you don't attach the head of the turkey to the plate is so you can add feathers all the way around! See, I told you I knew what I was talking about! ;)