Wednesday, March 28, 2012

3-2-1 Cake!


Okay, so this isn't technically a craft or art project but I just HAD to share! This is a 3-2-1 cake. 


What you need:
One angel food cake mix
One other cake mix (whatever kind you want..I used red velvet mmm...)
Water
Coffee cup
Spoon
Tablespoon measuring spoon
(Frosting optional)

First thing you need to do is get your two boxes of cake mix and combine them in a bag.
From box to bag.

Now, SHAKE IT BABY!
Once it's all combined, get your mug ready. Add THREE tablespoons of your mix into your coffee mug.
"Is that a Snoopy coffee mug??" Yes, yes it is.
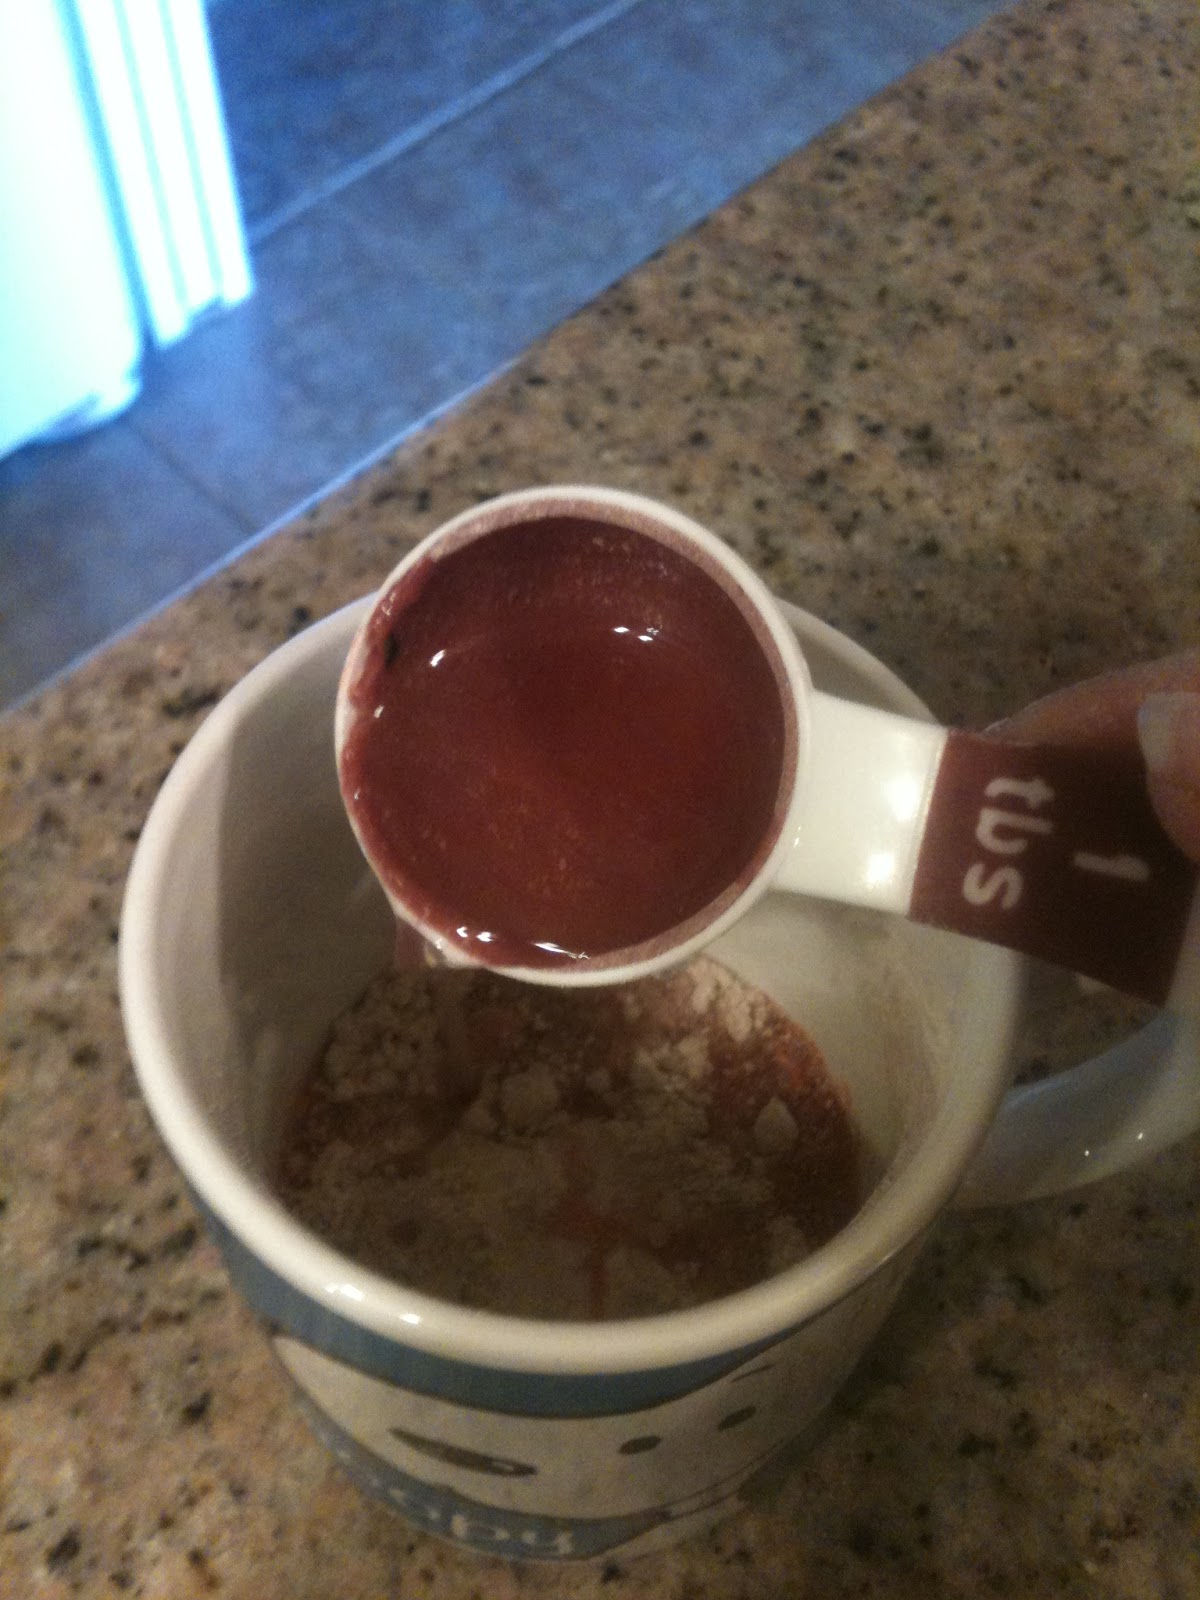
Now add TWO tablespoons of water.

Stir with a spoon...

Pop in the microwave for ONE minute and....
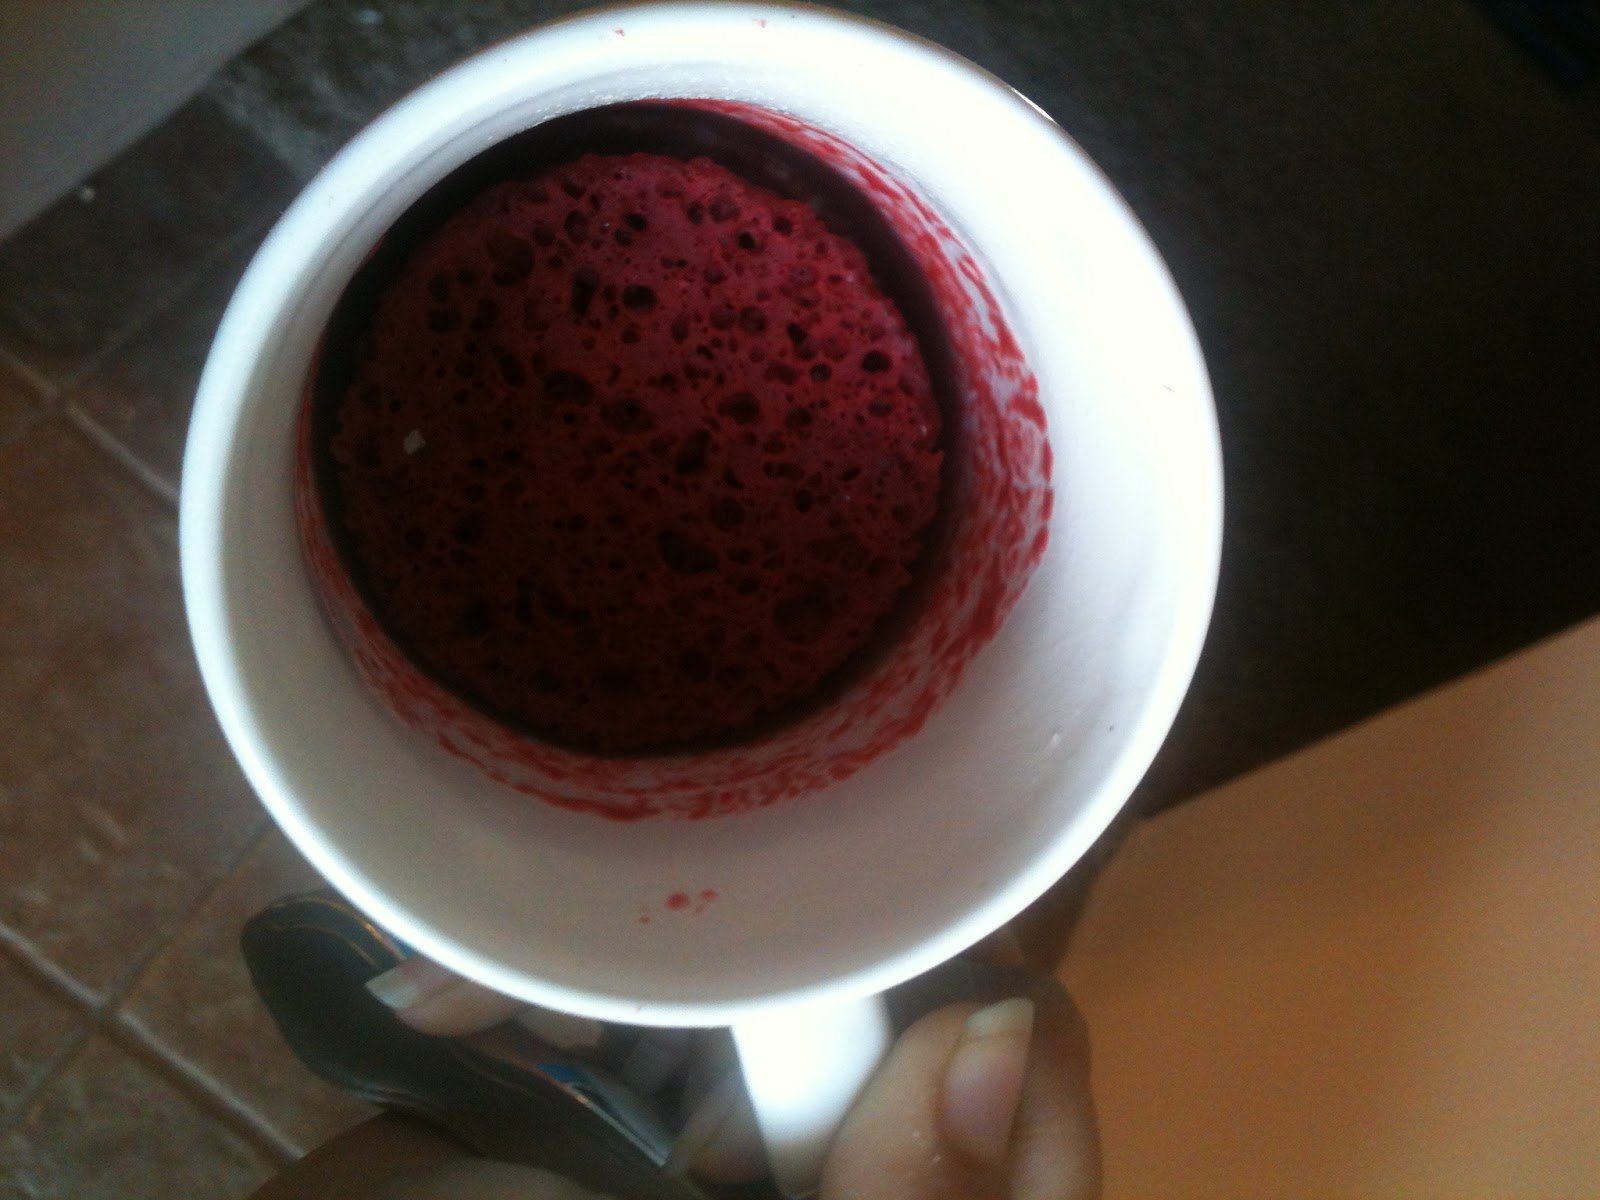
TADA!!! 3-2-1!!!

Now, you can enjoy it as is or if you are like me and feel it's a crime to have a red velvet cake without cream cheese frosting...you can add a smear of frosting. 


Without the frosting this is just a couple ww points plus. It depends on the cake you choose, but the other MUST be angel food for this to work. With frosting, just calculate your points. I used 1 tablespoon of cream cheese frosting, 2 points plus. It's great for unexpected guests or as a lower point dessert.

ENJOY!!!!!!!


Monday, March 19, 2012

Felt Flowers #2!

Okay, so these are totally different than the felt flowers I have made before, but the common thread is felt!

 What you need:
One or two (depending on your circle size) sheet(s) of felt (like the ones from Michael's or Walmart...not sure what size that is)
Sharp scissors (you can use dull...you'll just regret it, TRUST me)
Pencil
Glue gun (and glue sticks...hey, you can't say I didn't tell ya)
Button
Something circular to trace (cup, ribbon spool, I used a coaster)
Hair clip or pin (depending on what you decide to do with your flower)


So, let's do this! Start by tracing your circles on your felt. You will need 6 larger circles total, and one small circle of  felt. 

Just in case you need to know what 6 circles look like...haha
Take one circle at a time and repeat the following steps for all six larger circles. Fold your circle in half. It should look like a taco, if that helps.
Now, take one of the corners and fold it up to make a triangle shape.
Now, fold the opposite corner behind. You should get an "S" shape.
Do you sssssee it? Good. Now you will need to secure the folded circle by adding some glue at the folds.
I was able to capture this step thanks to the help of my lovely assistant, my sister in law, Sarah.
Okay, now that it is secure, you can attach the triangle to the smaller circle with your glue gun. Repeat with all six circles.
It should look like this.
Almost done! Now you can attach your button. I glued mine on but you can sew it if you like. If you want, you can add a jewel or any other center instead.
Lastly, add your clip or pin and tada!
Gorgeous! And a shout out to my mom in the background. =)


Enjoy!

Saturday, March 17, 2012

St. Patrick's Day Bell Pepper Art!

Okay, so with a daughter named Molly, how could I NOT post a St. Patrick's day project??

What you need:
Green paint
White paper
Bell Pepper
Knife
Paint brush

First, cut your bell pepper in half (be careful!!). You can remove the seeds if you like (I did), but be careful not to scrape out the inner walls (that helps make the "clover" shape).
Next, pour a layer of paint in a pan or tray and dip your bell pepper cut side down.


Stamp bell pepper on paper and TADA! Oh, and you use the paint brush to draw the clover's stems.
I got two bell peppers, one that had a "three leaf look" to it, and one that had a "four leaf look" (pictured above).

The kids really liked this one, and I hope you do too!
Enjoy!


Thursday, March 8, 2012

Hand Print Easter Lily

Okay, so if you know me, you know I LOVE hand print art. So this project is no different! It's a favorite of mine I do every year at work and with my class at church. It's a neat project that you can do with the kiddos and each year as your child grows so will your new lily!

What you need:
White and green construction paper
Scissors
Green pipe cleaners
Stapler
Pencil
kid (can use adult if no kid available...it's just kinda weird)


Okay, so first you trace your child's hand on the white paper. For this end product I made three flowers, in which case you will need to trace your child's hand three times...makes sense, right? Cut out the hand(s).

Next you are going to take the two lower sides of the hand and bring them together. Don't crease it! You want it to have a round shape to it. 
Now you insert the pipe cleaner into the bottom of the rounded hand print and staple it closed.

Now grab that pencil! We're almost done! Beginning at the tips of the fingers, roll the paper around the pencil towards you. Repeat for all five fingers...unless you don't have that many...
So far, so good? You can stop with one or you can make as many as you want! For my example I made three and added two leaves. Should you decide to proceed...here's what you do.
Trace your child's shoe.


Once it's cut out, cut it straight down the middle.
Now, using that pencil rolling you did with the hand (which you're a pro at now, right?), roll each shoe half at a diagonal. 

Now attach them to flower(s) and display proudly! 


You can get a bit more creative if you want and use yellow pipe cleaners for the center of the flower.
Hope this one will become an Easter favorite with you too!
Enjoy!


Friday, March 2, 2012

Happy Birthday Dr. Seuss!


I didn't have art this week at work but I just had to share! This is what the kids made!
(I made the big guy in the middle)
Enjoy!